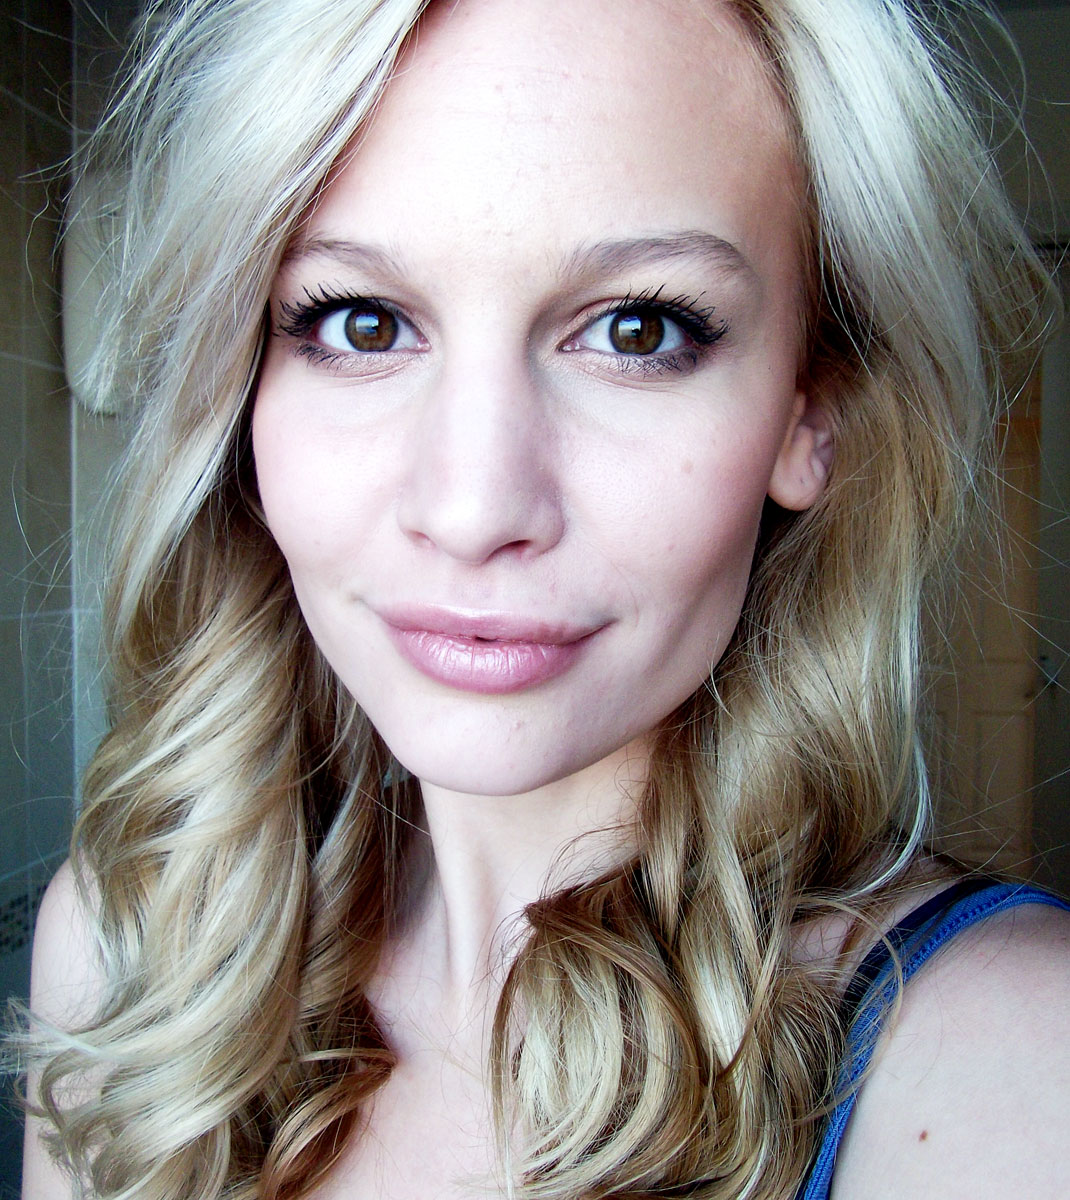
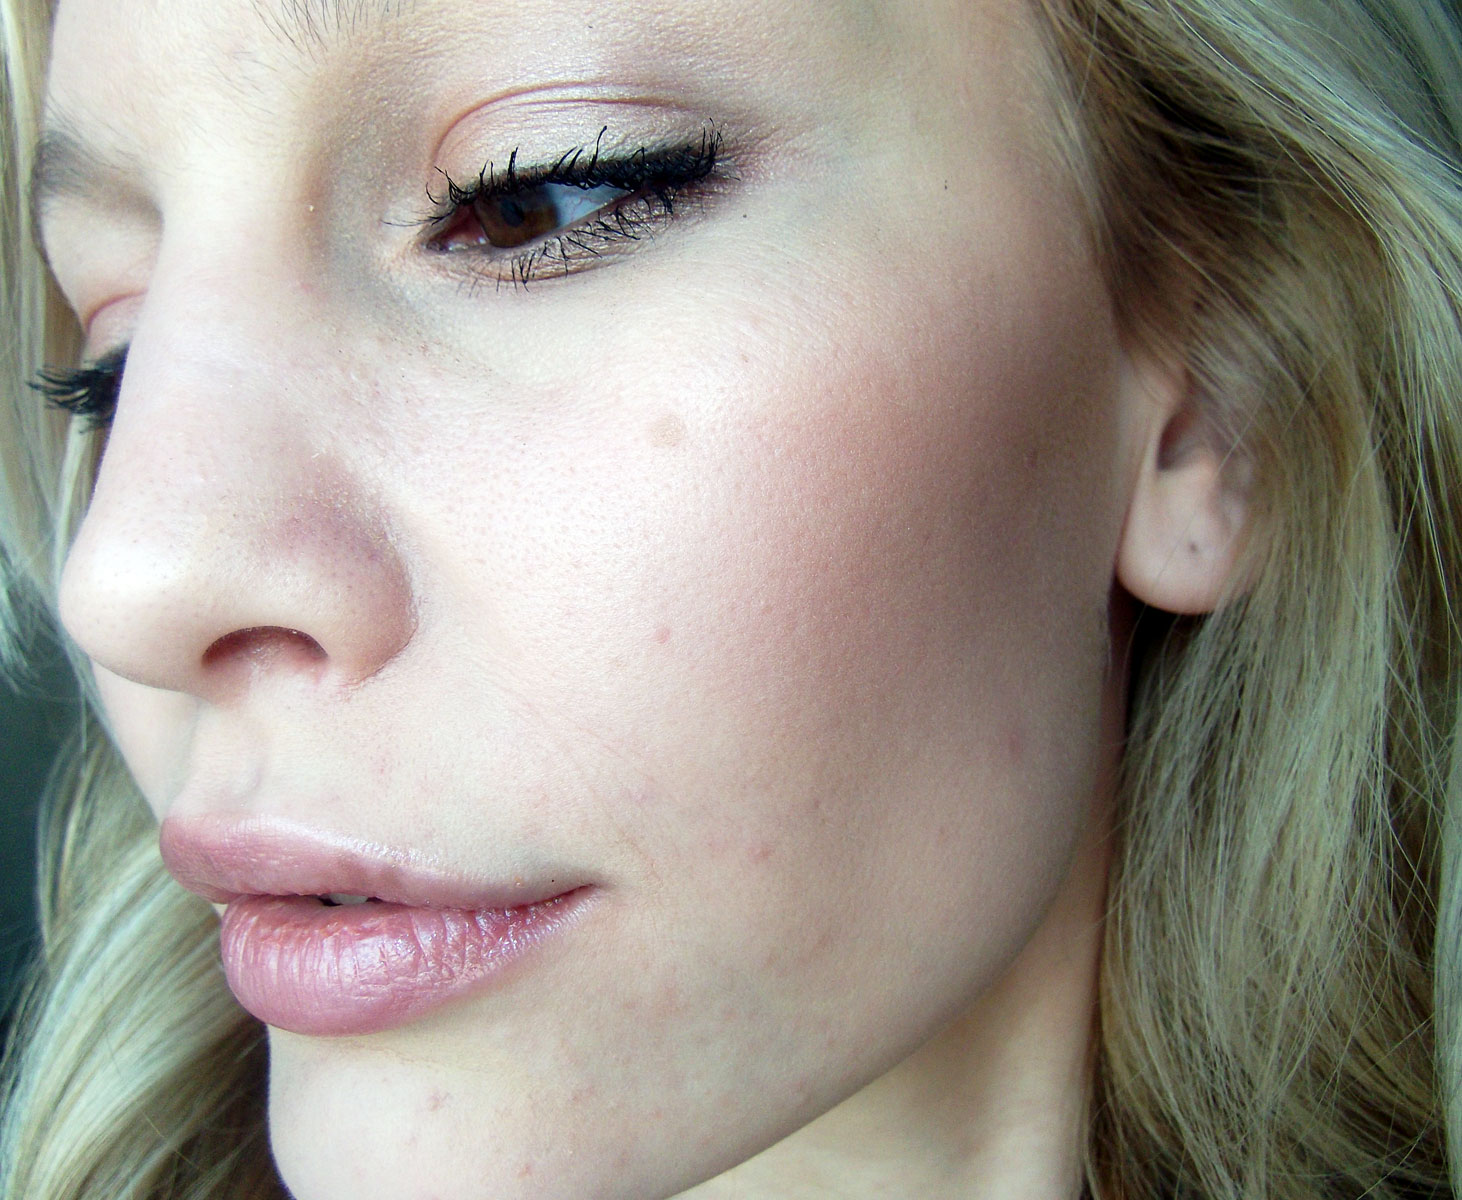
Today I filmed a Kate Hudson inspired hair and make-up tutorial. She seems to have two signature red carpet make-up looks, a coppery-bronze look and an aquamarine/turquoise one. I chose the copper/bronze look, with minimal liner, bronzer and a little dark peach blush on the cheekbones for a sunkissed glow. Unfortunately, there is nothing "sunkissed" about any of these pictures as they were taken in my bathroom where the lighting is very cool...sorry! Plus it's cold and snowy outside, not exactly sunny California...hahaha! But you get the general idea. Here's a closer look at the make-up.


How I achieved this look:
I started off with a base of Bare Minerals Foundation in Medium and Maybelline Dream Mousse concealer in 01 Nude Beige under the eyes.
1. I applied a base of MAC's Prep+Prime for eyes in Medium with my ring finger, all over the lid and lower lashline.
2. I applied Pupa's Mineral Silk eyeshadow in #7 (a coppery colour) to the entire lid with a flat e/s brush, and a little to the lower lashline using an eyeliner brush.
3. With a blending brush I applied a little bit of the bronze colour from my Sleek Storm palette to the crease and blended it out. I also applied some of that using the pencil brush to the outer corners of the lower lashline.
4. Using the applicator I applied some Maybelline Eyecolor Express eyeshadow in #2 Vintage Rose all along the rest of the lower lashline and in the inner corners.
5. Using a fluffy blending brush I applied some of the lightest colour (a light cream with gold glitter in it) from my Golden Rose palette in Brown to the brow bone.
6. I applied some Impala Waterproof pencil liner in black to my upper waterline and a tiny bit to the outer corners of my lids.
7. Next I applied two coats of Maybelline Pulse Perfection mascara to both top and bottom lashes.
8. I used Bare Minerals Warmth to bronze my temples, cheekbones and jawline.
9. I then swept some Kiko Dreams blush in Soft Sand along my cheekbones for an added sunkissed look.
10. I finished the look off with this neutral pink Avon Hollywood Lights lipgloss in Celebrity Pink! (This was a gift from the lovely Rebecca! I LOVE the colour!)


Then for the hair to create tousled beachy waves I used my TreSemme curling iron (it sucks by the way, takes ages to heat up...I don't recommend it!!). All I did was wind strands of my hair around the iron with it facing downwards, and the hair always curling away from my face. You'll get a better idea of this in the video tutorial which you can watch here! Finally, I flipped my hair over and just loosened the curls for a more tousled, beachy effect!

And this is the finished look!
Stay Stylish!
xoxo

you look beautiful :) x
ReplyDeleteKate always have stunning hair! Love your take (=
ReplyDeleteyou're soooo pretty! this suits you so much! :D
ReplyDeleteYour hair looks really pretty
ReplyDeleteGreat look as usual simple and wearable just perfect. Congratulations!!!
ReplyDeletebronzey colours really suit you xx
ReplyDeleteYou did an amazing job! I thought you were wearing fake eyelashes! Just found your blog and I love it. I'm your newest follower.
ReplyDeleteGreat tutorial Anna! I LOVE the hair and can't wait to try it.
ReplyDeleteNo worries about the bathroom lighting...It isn't even sunny in California today. ;)
LOVE this look on you, and those curls in your hair are beautiful...very well done!!! Always enjoy a nice, natural look!
ReplyDeleteLiesl :)
Those colours suit your skintone so much & I love the hair look! Very pretty <3 xo
ReplyDeleteSimply gorgoues! Great job! (: Lots of love! xx
ReplyDeleteLove love love the hair!
ReplyDeleteHave you ever thought of using clear or brown mascara? I think blondes have such a harder time with mascara since it doesn't match your lashes naturally.
Beautiful as always! :D
ReplyDeleteLove it! Simple and perfect (although i always have trouble doing my hair like that!)
ReplyDelete